Headers AND Heater!!
Van Pershing, Tucson Corvair Association
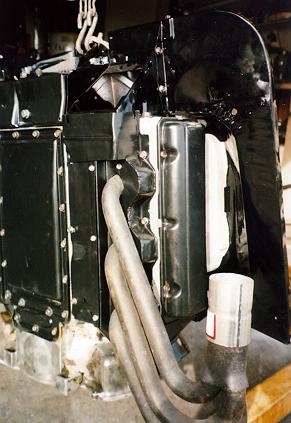
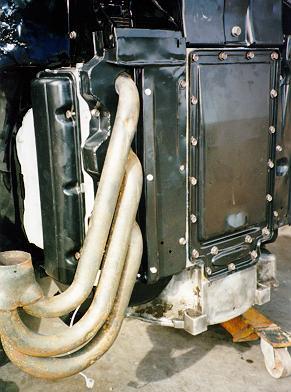
Now the headers and exhaust system are working well but its cold outside and I'd like it to warm inside (the Corsa, that is). As everyone knows when you put headers on your favorite Corvair you must remove the sheet metal shrouds that catch the heat that is routed into the passenger's compartment for wintertime comfort. Those who have headers always say, "It's easy. Just fabricate some sheet metal." A nice concept but I had never seen an actual setup. So, with the engine out of the car and a pair of scissors and some cardboard, and some extra original sheet metal, I started putting things into place.
After installing the headers on the engine and holding the original covers in place to have a look at what had to be done, the parts of the original sheet metal that could be used were cut out and then bolted back onto to the engine. With cardboard and a marker pen patterns were fashioned that would be cut out of some thin-gauge sheet metal and then welded in place.
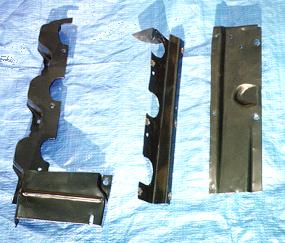
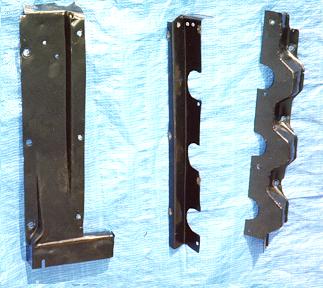
RIGHT SIDE: Piece of original cover with piece cut using pattern welded in place (left). Fabricated sheet metal bent in "Z" shape (center). Original cover cut to fit (right).
LEFT SIDE: original cover cut to fit (left). Fabricated sheet metal bent in "Z" shape (center). Piece of original cover with piece cut using pattern welded in place (right)
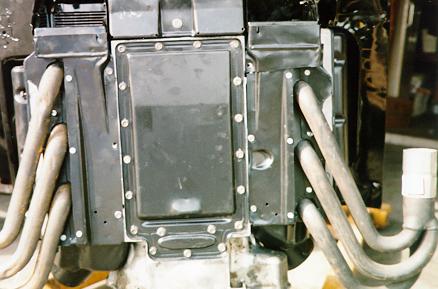
Holes were then drilled in the appropriate place and j-nuts installed so that there is a way to attach this three-piece assembly together. Here one needs to be extra careful to place the holes in places where they can be reached after the headers are installed, otherwise you can't get to the screws to put the thing together.
Having the cover in 3 pieces makes it easy to put all the sheet metal in place after the headers have been installed. There is plenty of room to mount the thermostats in their "stock" position. I chose to leave the heat shields off of the t-stat mounting brackets since there is not hot manifold log to cause damage. The stock bolts are used to attach the covers to the block and heads and there are a couple of those that aren't real easy to get to. All in all, it's not real difficult to install.
Heat? Well, with the stock manifolds and covers in place the heater works better because the entire exhaust manifold is inside the covers adding to the heat. All you get with this system is the heat coming off the cylinders, but that's plenty for defrosting the windshield and providing a little heat to keep the chill off. I'm sure this wouldn't be the greatest in the dead of winter in Minnesota, but it works great on a cold winter's day in southern Arizona.
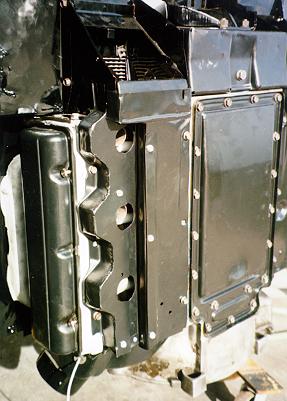
View of driver's side without headers installed.
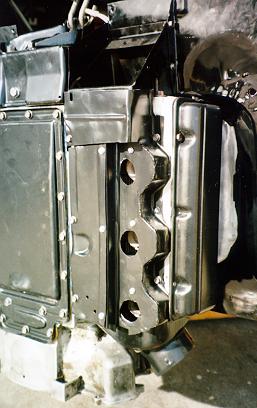
View of passenger's side without headers installed.
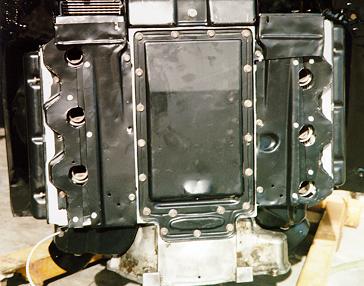
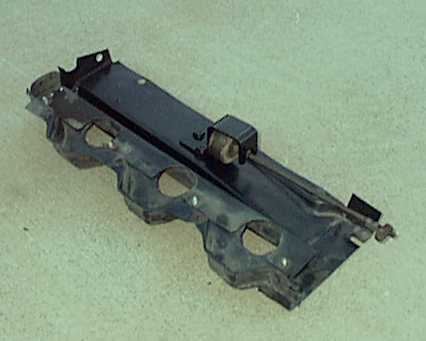
Here's a picture of the left-hand shroud with the thermostat installed.
This is a view looking directly up at the bottom of the engine without the headers installed. The location of the screws that hold the cover assemblies together can be seen.
More photos of the system with the headers installed
