Late Model Corvair Rear Motor Mount
January 2006
Since it's a new unit not core charges apply.
The following is what you might call a product evaluation.


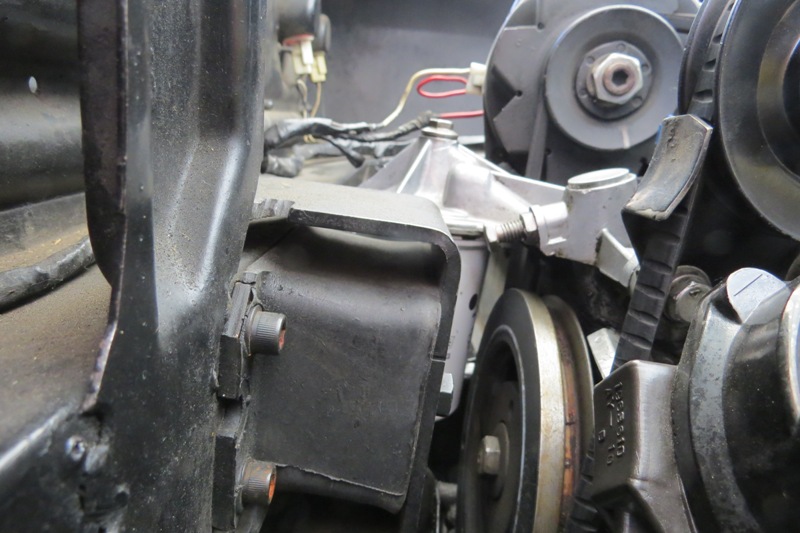
Conclusions: I like the unit. It wasn't a real joy to install because I had to do it twice to find out the slot and hole alignment problems. Other than that it wasn't much different than installing an OEM unit. Overall appearance is good and it functions well, and only time will tell if "hangs" in there.
After ten plus years, the mount is working well without problems.
If you've used one of these units and/or have any additional comments, please drop me a line at vpersh@yahoo.com and I'll add them here. Thanks, Van Pershing
Mike Hicks - 02/01/06:
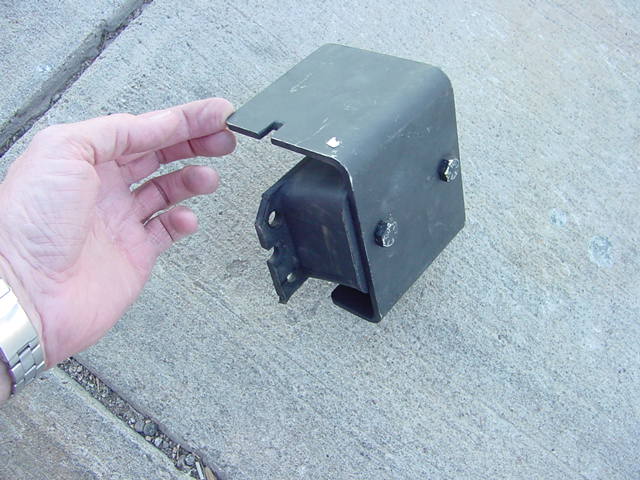
I installed one of these that I got from Clark's in my 1965 Monza convertible. I experienced similar difficulties getting in place but I managed to get it positioned without any grinding or filing. I was not able to use the figure 8 washer though. I put mine on in May of 2005 and so far so good (January 2006). The non-stock appearance bothers me a little but the price and functionality were right.
Kirby Smith - 02/26/06 :
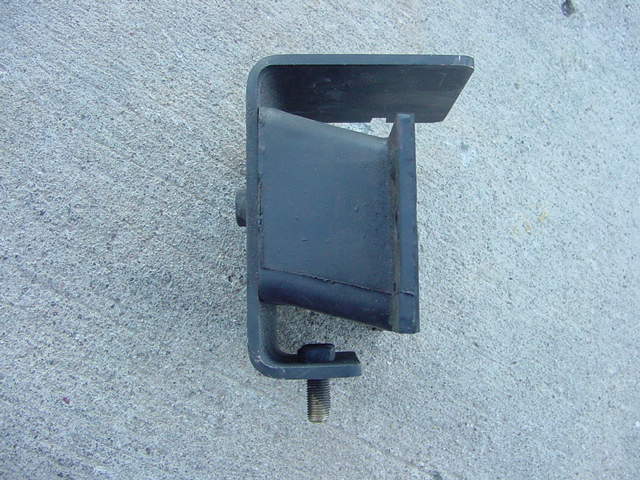
Now that I have taken the initial steps (thanks Padgett) for installation, in my opinion this heavy duty mount is a good idea badly executed. Beyond the barely long enough, untapered bolts used for studs (GM made them long and pointy for a reason), and beyond the reported need to drag holes and slots as required (the LM OEM unit has slots for the mounting bolts for a reason), and beyond my uncertainty w.r.t. the effect on strength of welding on the heads of the Grade 8 bolts used to build it, the example I got from Clarks doesn't fit the figure-8 washer, which does fit the two LM and one EM motor mounts in my possession. It is no more likely to fit the engine cradle, which appears to have even less freeplay.
It would seem that a jig was not used (as it should have been) to establish the alignment of the bolts used for stud.
I'm not going to mill the washer and the engine cradle to accommodate this out-of-tolerance mount. I'm going to ask Clarks to replace it with one that fits the figure-8 washer. Then I can determine what milling is needed to get it to fit the frame.
kirby
66 turbo Corsa (bought new)
Padgett wrote:
Jeff Brekke no longer has any of the mounts he was making, which I had heard were quite good?
Had virtue of having replaceable inserts but I e-mailed Jeff and he did not have any. When he did they were a little more expensive.
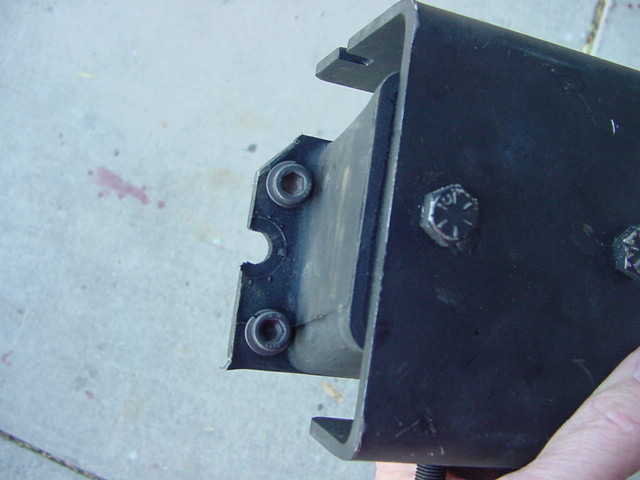
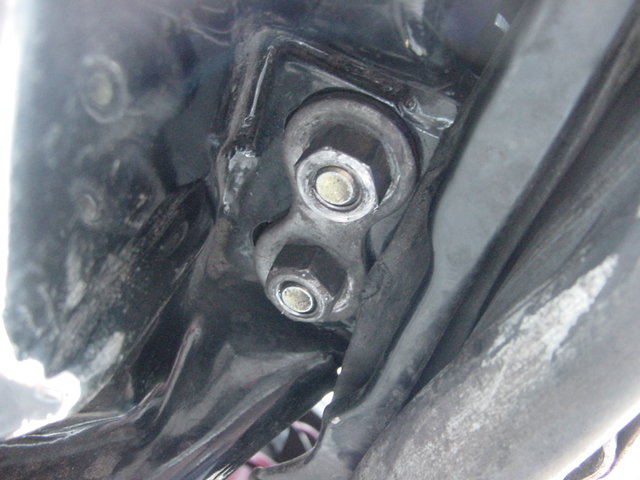
Mount had no indication of origin or any markings on it. Was part of a paper tag attached but not enough to read. I had to e-mail Lon to ask about them and are on page 28 of Clark's supplemental catalog. I couldn't use the "figure 8" washer under the two stud nuts, the studs weren't long enough I remembered these feeling a bit a bit short but remember the factory setting for the rear mount nuts (65 FSM specifications (in back) page 5) is 50-60 ft-lb.
The picture on the right was taken after torqueing both to 50 lb-ft and then removing. 5.5 to 6 threads were engaged (turns before nut fell off) on both. Nuts were replaced and retorqued then one was removed again for the photo. Remember these are locking nuts so taller than most. Note that the threads come to within about a 1/16 of the end unlike the factory studs which have a tapered guide end. I believe this is sufficient though barely and another 1/8" would be nice. If someone with more expert/current knowledge has a different opinion please let me know.
I know this is getting a bit AR but only took about ten minutes and it is 68 degrees in the garage.
Padgett
